Let me start this post by saying that I am NOT an expert in neither Montessori or the Waldorf education or philosophy. Not even close! I have read a few things and the Steiner approach seems very appealing to me, that's all. I follow some very talended and educated people on the internet that have embraced this approach for their kids and I keep the things I like out of this philosophy. Lately, I noticed that my daughter tries to understand the meaning of time in general. She asks about the seasons, the days and the holidays a lot. I needed a visual representation for her so I decided to make her a Waldorf perpetual calendar, that she can use herself. I kept seeing some gorgeous wooden ones on istagram but they are far beyond my budget right now and I almost always want to make things myself. So, I came up with this DIY Waldorf perpetual calendar that didn't cost me a penny!
The Waldorf perpetual calendar I see more often is a wooden ring with holes for 12 peg dolls that represent the months, a wooden cup to put the current month and two wooden cubes with the numbers for the date on them. My first thought was to find a slice of wood and make it myself, but being on lockdown it was almost impossible. Then I saw this instagram post by @sustainablyenchanted and I got an idea! I would make the ring out of felt! I did like the idea of the painted pebbles though, so I did that too!
DIY Waldorf perpetual calendar
Supplies
Pieces of felt in green, blue, yellow, red and another neutral color
12 pebbles that can lay flat
A small ceramic bowl (I recycle mine from our yogurt)
2 3cm wooden cubes (with numbers or not). You can find them here.
Watercolors and brushes
A white pen
Thread and sewing machine (or you can sew it by hand)
A pair of scissors
DIY Waldorf perpetual calendar
Procedure
My advice would be to start off with the painting first.This is one of the things you can do with the help of you child and can engage him/her into the use of the calendar later on.
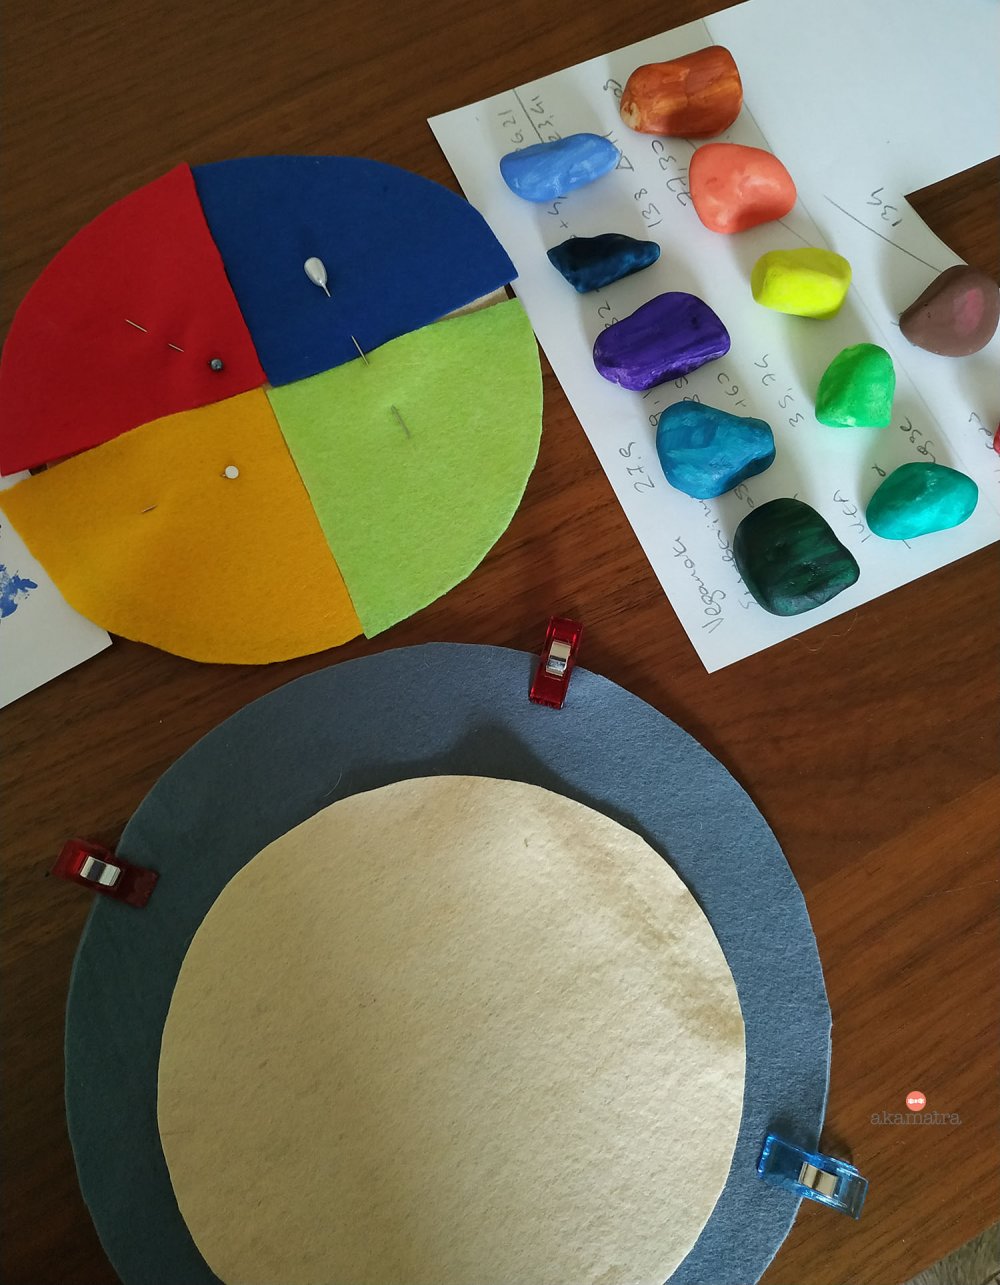
First clean, wash and dry your pebbles. Then select the colors you are going to use for each month. The winter months are represented with purple/blue hues. The spring months get more green hues, the summer months progress from light green to light orange and the fall months are in the red/brown hues.
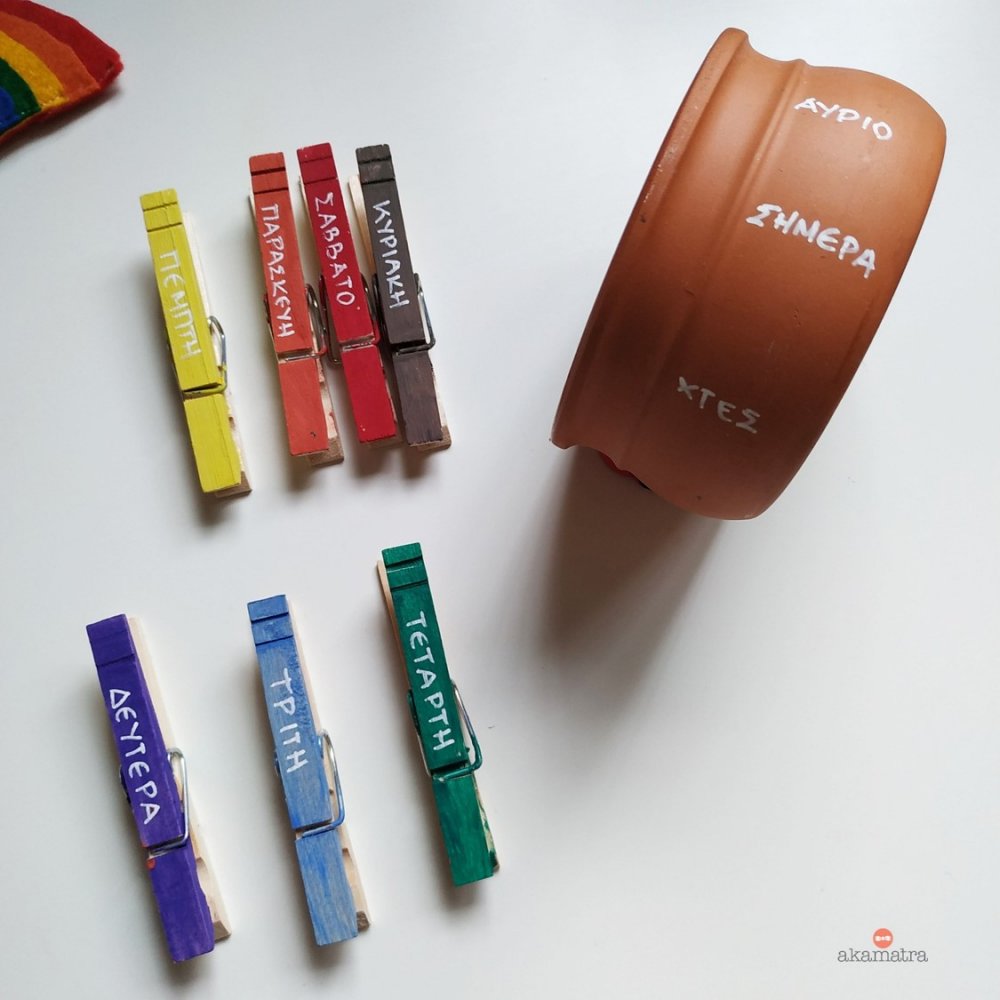
Paint each pebble and let them dry. While they dry, start painting your clothespins. I didn't have a specific plan for these colors, I just used the rainbow colors and a grey. I painted one of the sides and left them to dry.
DIY Waldorf perpetual calendar
While all these are drying, it's time to prepare your "ring" or circle of felt. I used a plate (how professional) and draw a circle out of beige felt. I cut off two pieces of the felt. Then I cut a quarter of the same sized circle in paper to create a pattern for my four season quarters. I used that to cut one piece of each of the four colors of felt.
Then I pinned them down on the two pieces of beige felt and sew them all together. It was a chance to use the fancy sewing styles of my sewing machine!
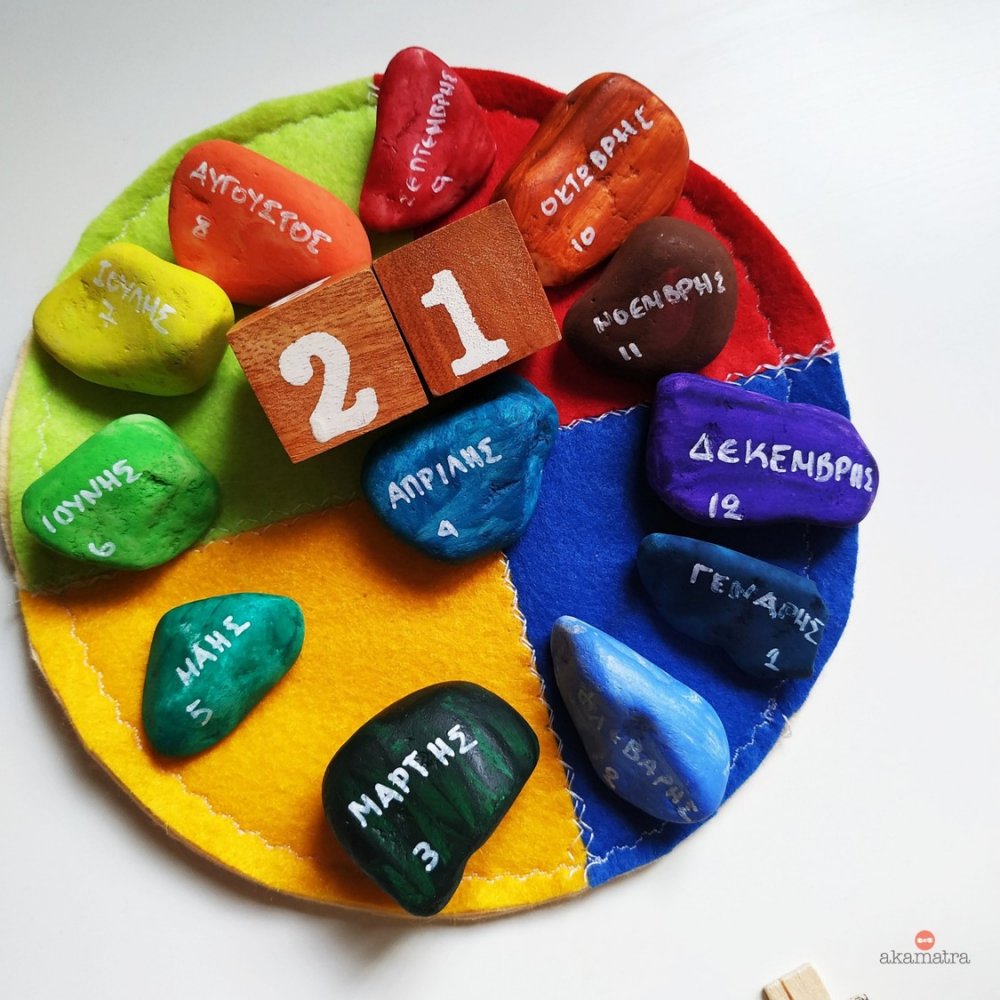
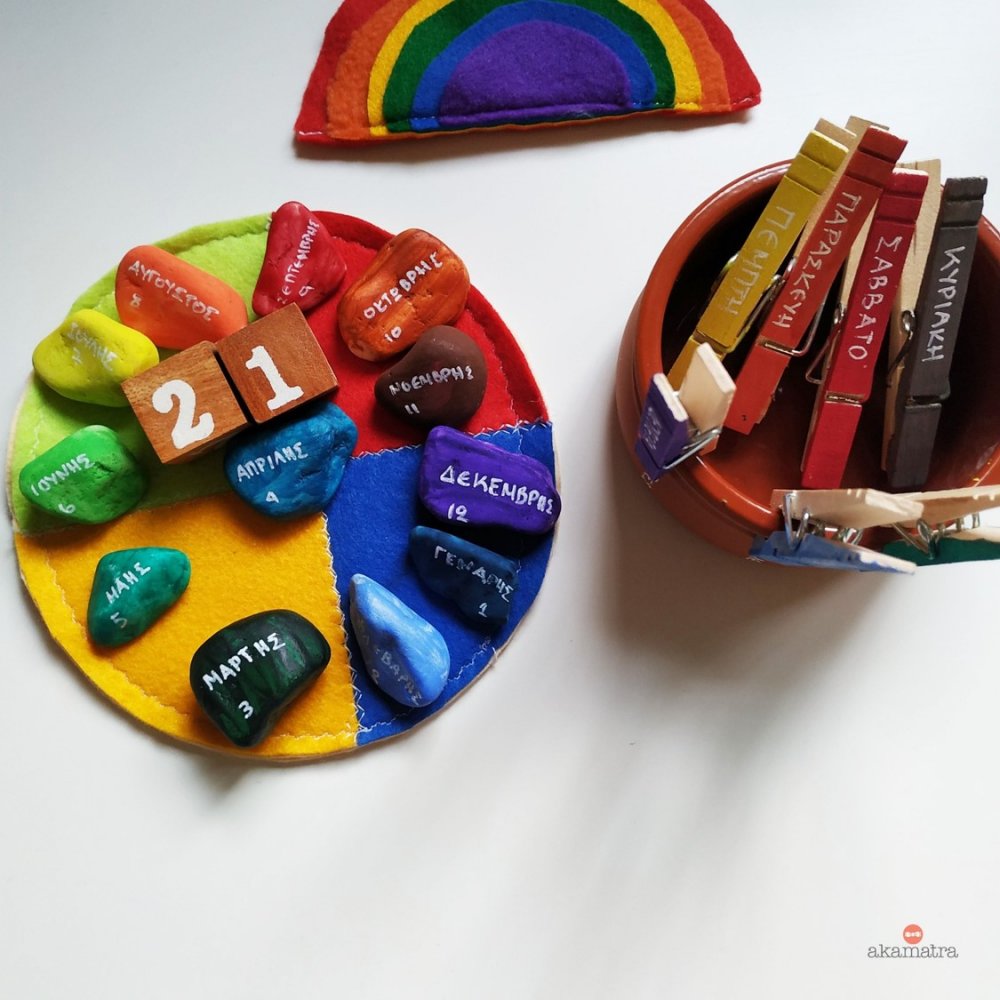
When you pebbles and clothespins are completely dry, use your white colored pen and write the names of the months on the appropriate pebble. I also included the month's number, not sure if it fits in the philosophy but I don't really mind. You can decide for yourselves if you want to do it or not.
Then I wrote the names of each day (in Greek) in the clothespins. I then used the same pen and wrote the words "yesterday", "today" and "tomorrow" on the side of the ceramic bowl. The bowl is going to be used as a day calendar and above each of these we are going to put the clothespin with the correct day. That way she gets to know what day it was yesterday and what's tomorrow.
DIY Waldorf perpetual calendar
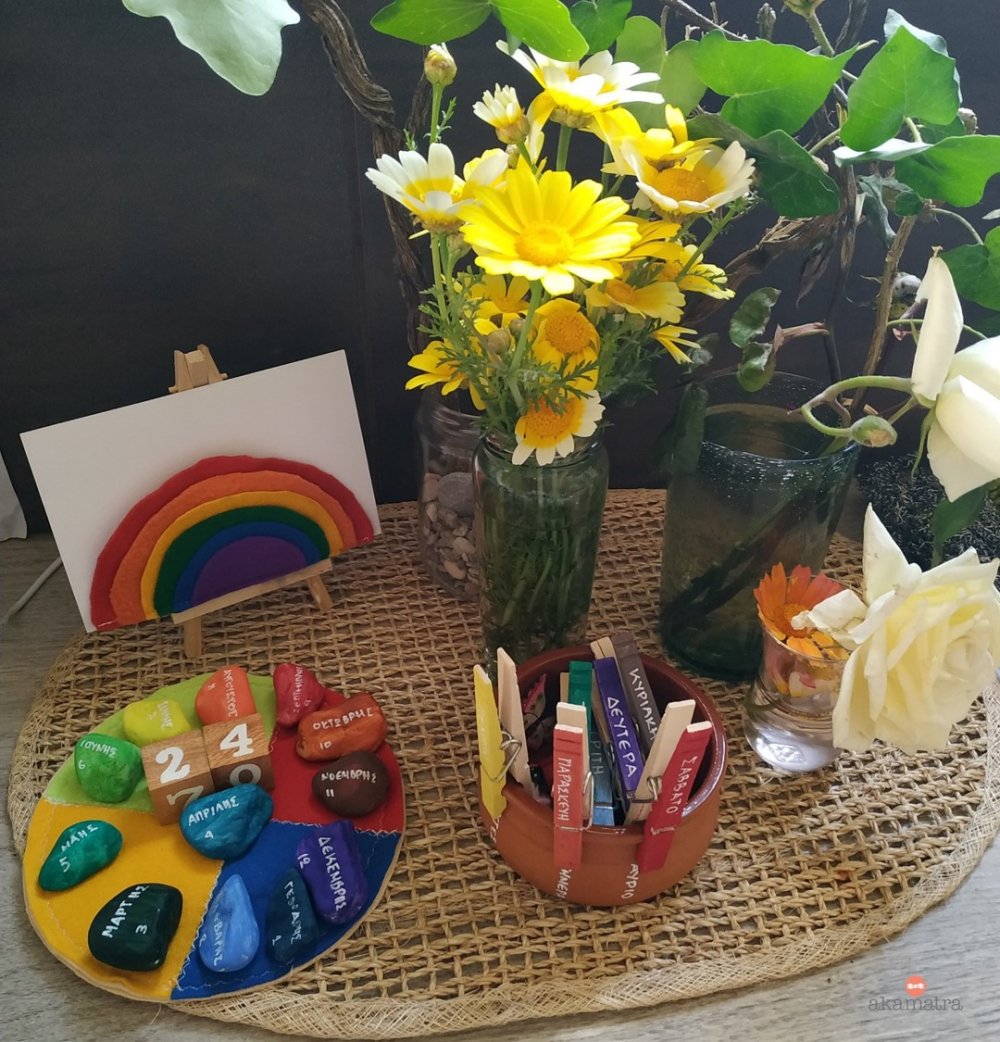
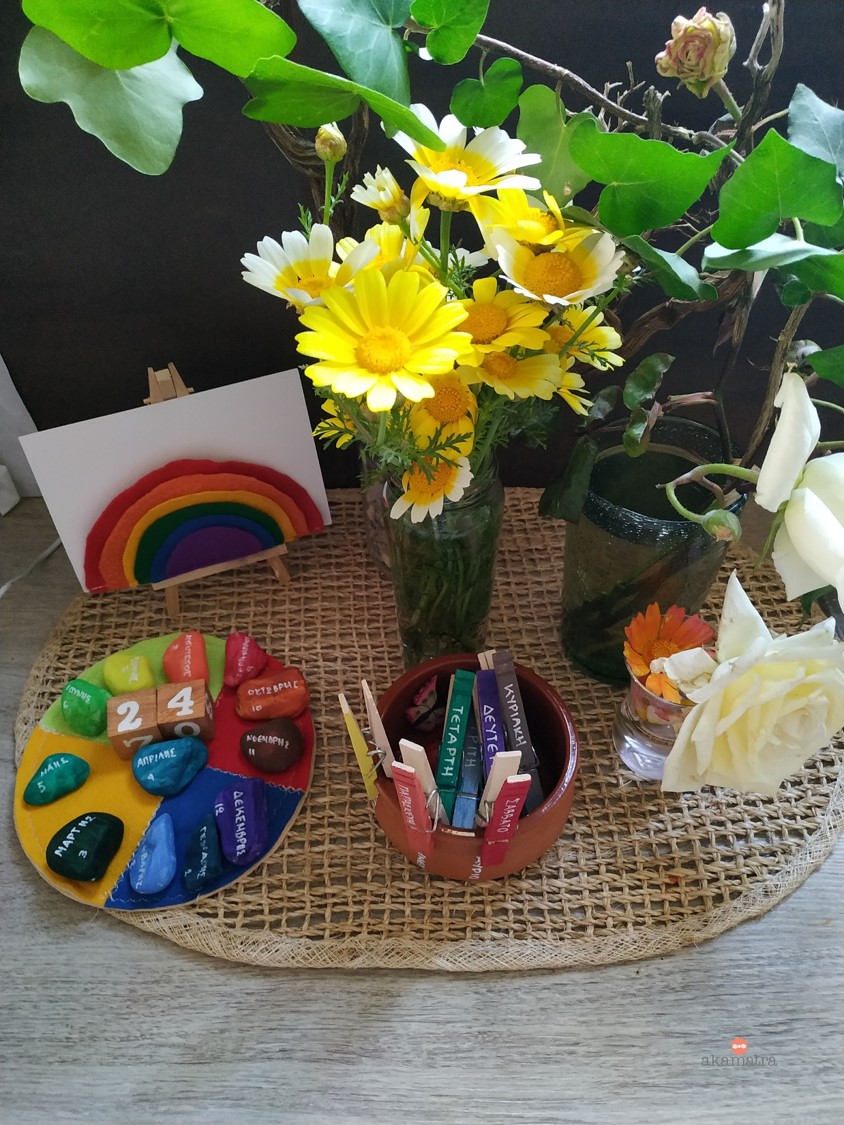
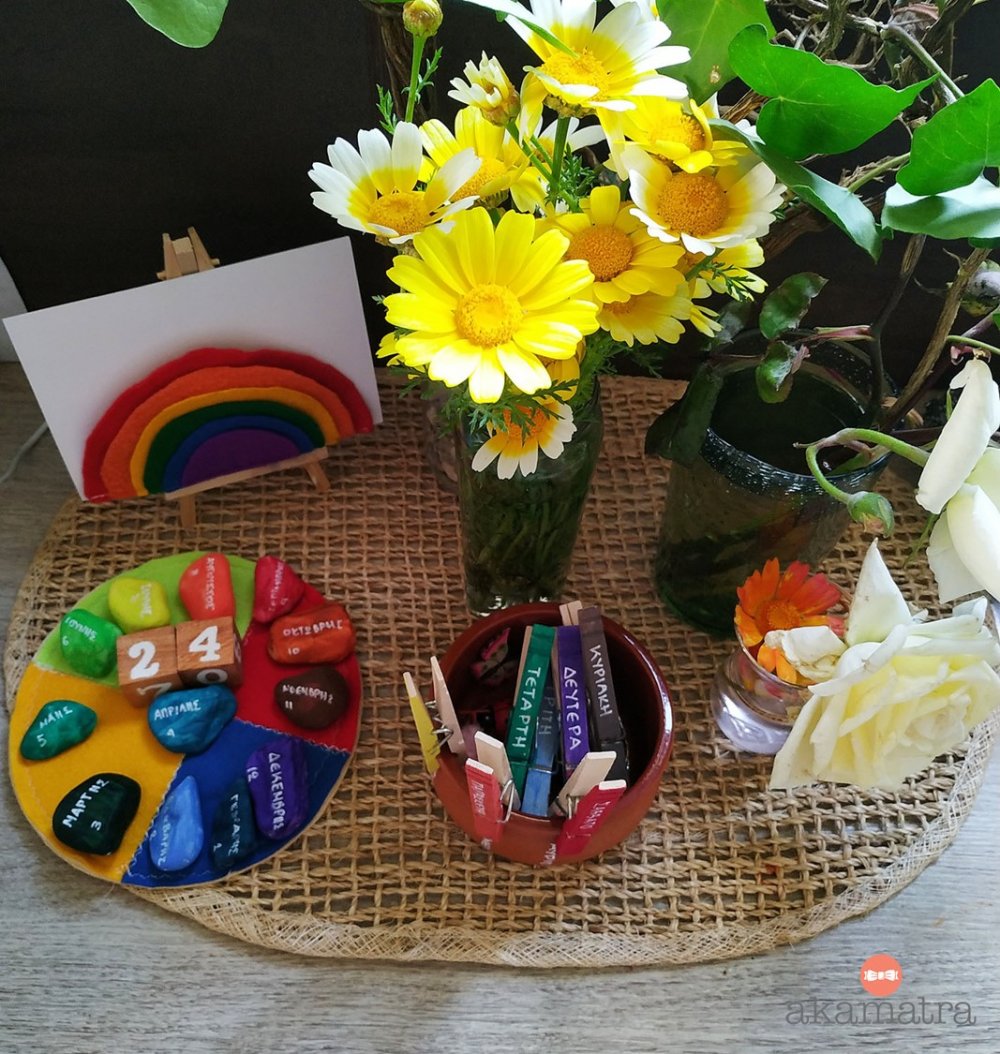
When everything is ready, it's time to assemby the calendar. We have a dedicated counter space for our flowers and decorations of the season and this fits right in!
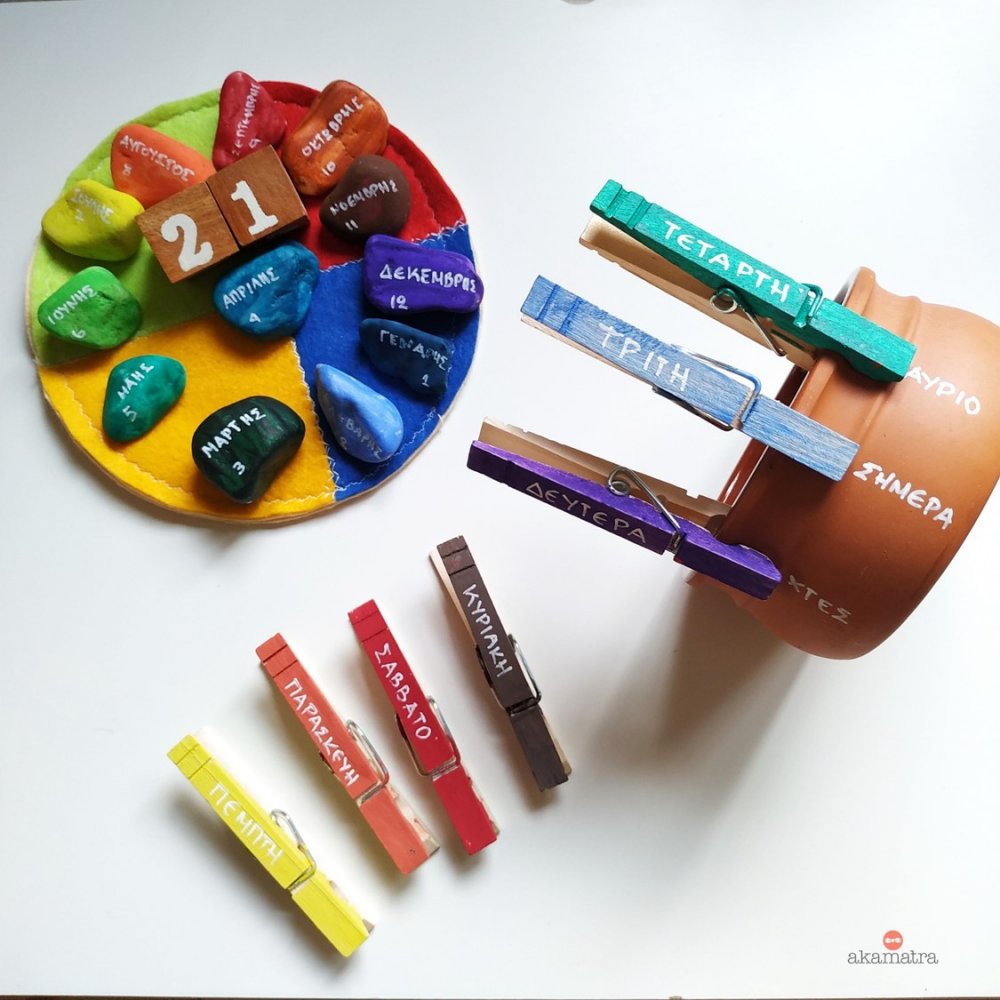
Place the felt disk and then place the pebbles in the correct color. Take the current month and place it in the center of the circle. Place the two wooden cubes behind it to show the current date.
Now place the ceramic bowl beside the circle and place the clothespins in the corresponding date. The rest of the clothespins lay in the bowl.
Each day, before or after our breakfast, we change the name of the day and the number of the date! We talk about the season's characteristics a bit and get on with our day! We've been doing this for 3 days and it's remarkable to see how fast she's learning the days!!!
DIY Waldorf perpetual calendar
I hope this will inspire you to make one for your kids!